
Back takes
Back Take from Mount
The standard punishment for turning away under mount, and the clearest example in the sport of a defence becoming a worse position.
This is not really a technique you perform. It is one you collect. The back take from mount happens because the person underneath decided to turn away, and your job is to be ready for the decision rather than to force it.
It is worth understanding in exactly those terms, because people who treat it as something to attempt tend to go hunting for the back, lose the mount in the process, and end up in half guard.
Where it comes from
This model records four sources — mount top, technical mount, S-mount, and mount bottom — which is a slightly unusual list. The last one is the interesting entry: the same edge exists from the bottom player’s perspective, because the moment they turn is the moment the transition happens, and the graph records that the turn is available from both sides of the position.
Practically: you are mounted on somebody, and they are trying to get out.
Why turning away is the mistake
Under mount, a person has two broad escape families. They can face you and frame — the elbow-knee escape, the bridge and roll — or they can turn away and try to get to their knees or to crawl out.
The second one feels natural. A person being pinned wants to turn away from the pressure, and turning onto your front is an instinct rather than a decision.
And it gives up the back completely. Once they are on their side facing away, your chest is already on their back, their arms cannot reach you, and there is nothing between you and the harness. The taxonomy’s own description puts it plainly: this is the standard punishment for turning away under mount.
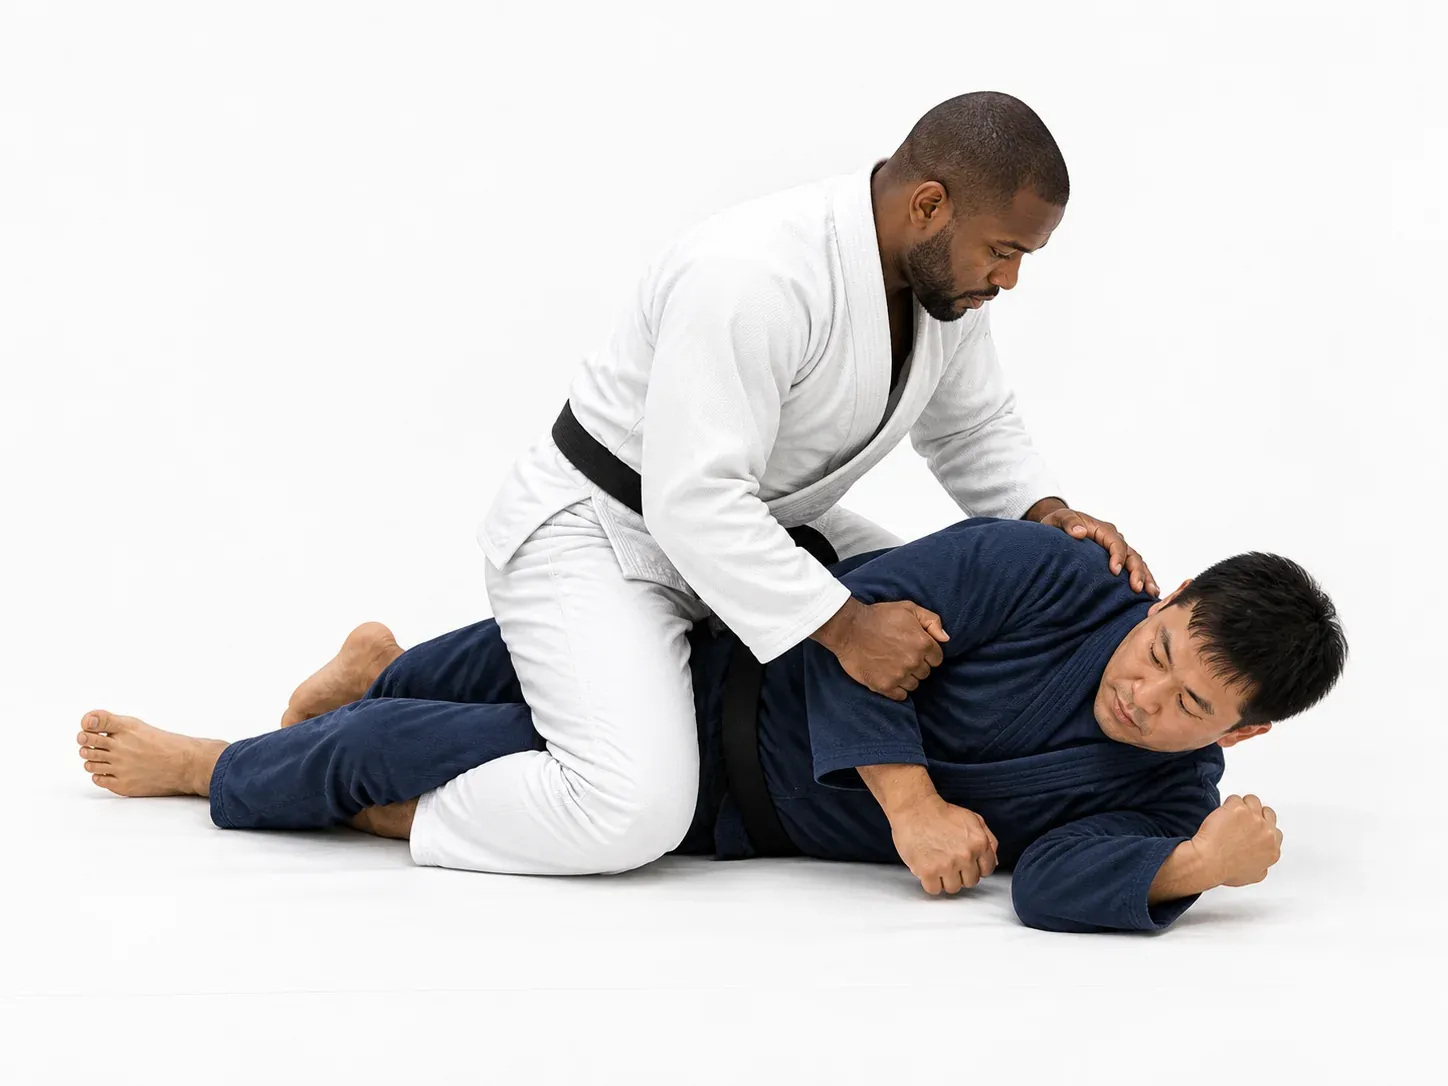
The useful thing to understand — from both sides — is that mount escapes work by facing the problem. The escapes that turn away trade a bad position for a worse one.
How to take it
The core instruction is short and physical: follow their rotation with your hips, not with your hands.
When they turn onto their side, the instinct is to grab — to reach for the far shoulder, to snatch a seatbelt. Reaching lifts your weight off them, which is exactly what they need to complete the escape. The alternative is to let your hips follow them around, staying connected, which keeps the pressure on and puts you in position for the harness without ever giving them room.
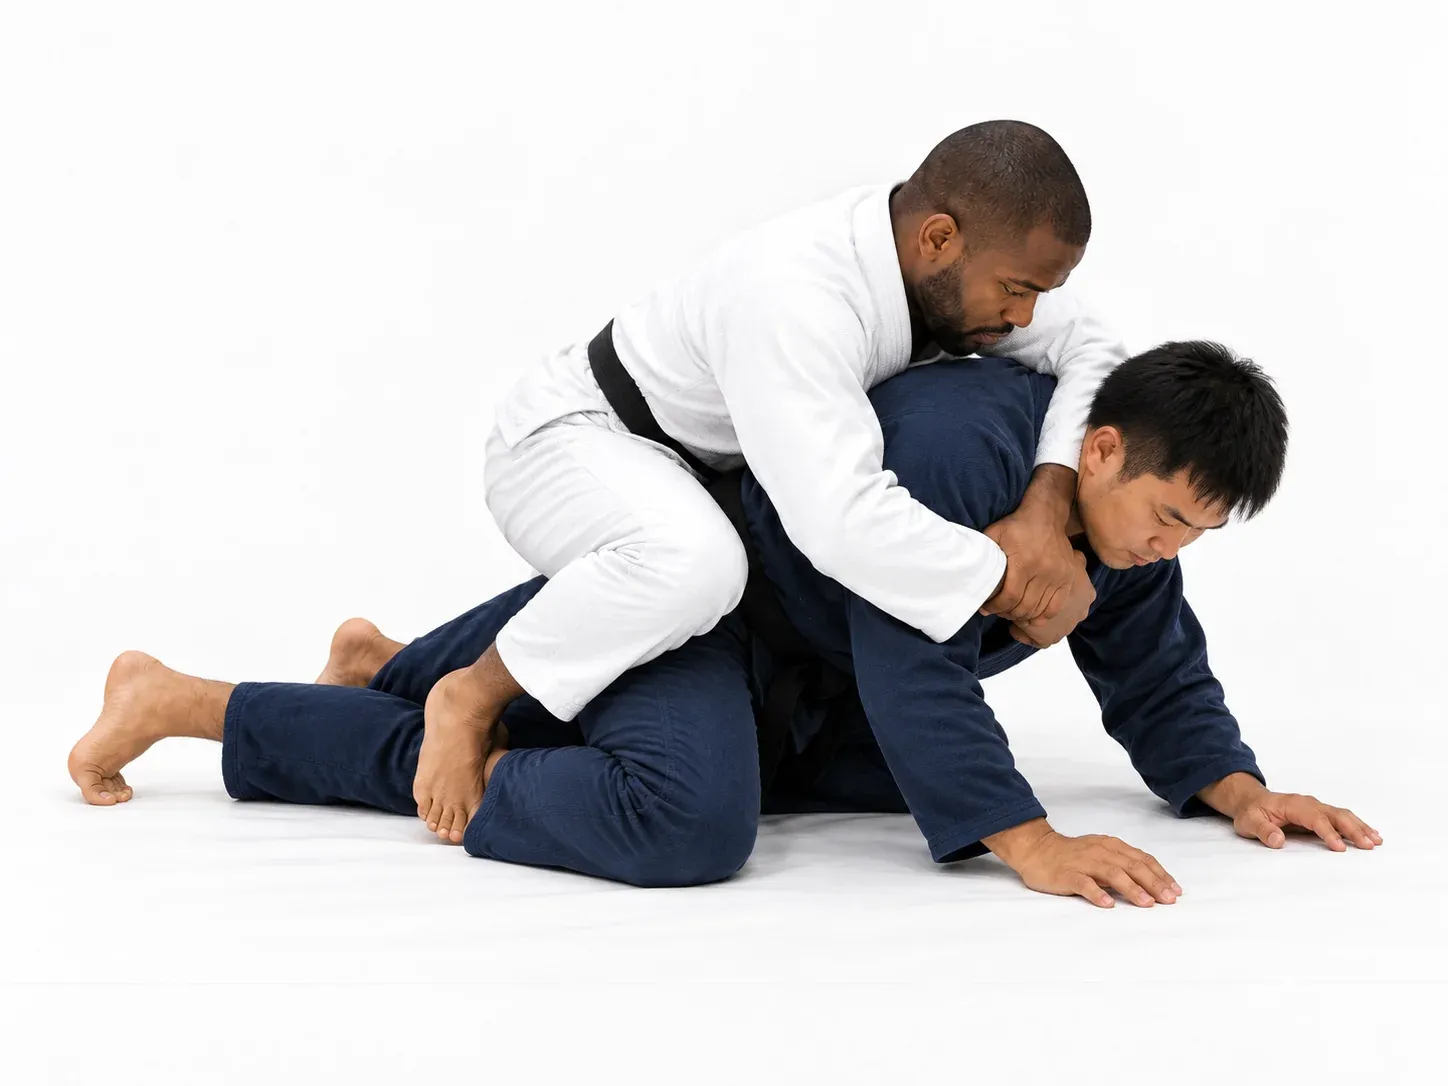
The sequence:
- They turn. Onto a side, away from you.
- Your hips follow. You slide into technical mount — knee up on the side they turned towards, chest still heavy on their back.
- Seatbelt first. One arm over the shoulder, one under the armpit, hands joined. Control before hooks.
- Then the hooks or the body triangle. Insert the bottom hook first, the top one second, or lock a body triangle if that is your preference.
- Land on your side, not on your back. A back take that finishes with you flat underneath them has given away most of the advantage.
The order of steps three and four is the one people get wrong. Hooks without the seatbelt is a position they can spin out of; the seatbelt without hooks is still control.
Why patience is the technique
The taxonomy’s own note on this entry ends with “a good reason to stay patient in mount”, and that is genuinely the main coaching point.
A mounted opponent who is not being attacked will usually do nothing. A mounted opponent being attacked has to move, and most of their movements are either the turn (which gives the back) or the bridge (which gives you the chance to re-settle or to attack an arm). So the attack that produces the back take is often not a submission at all — it is pressure, an americana threat, a collar grip, anything that makes staying still worse than moving.
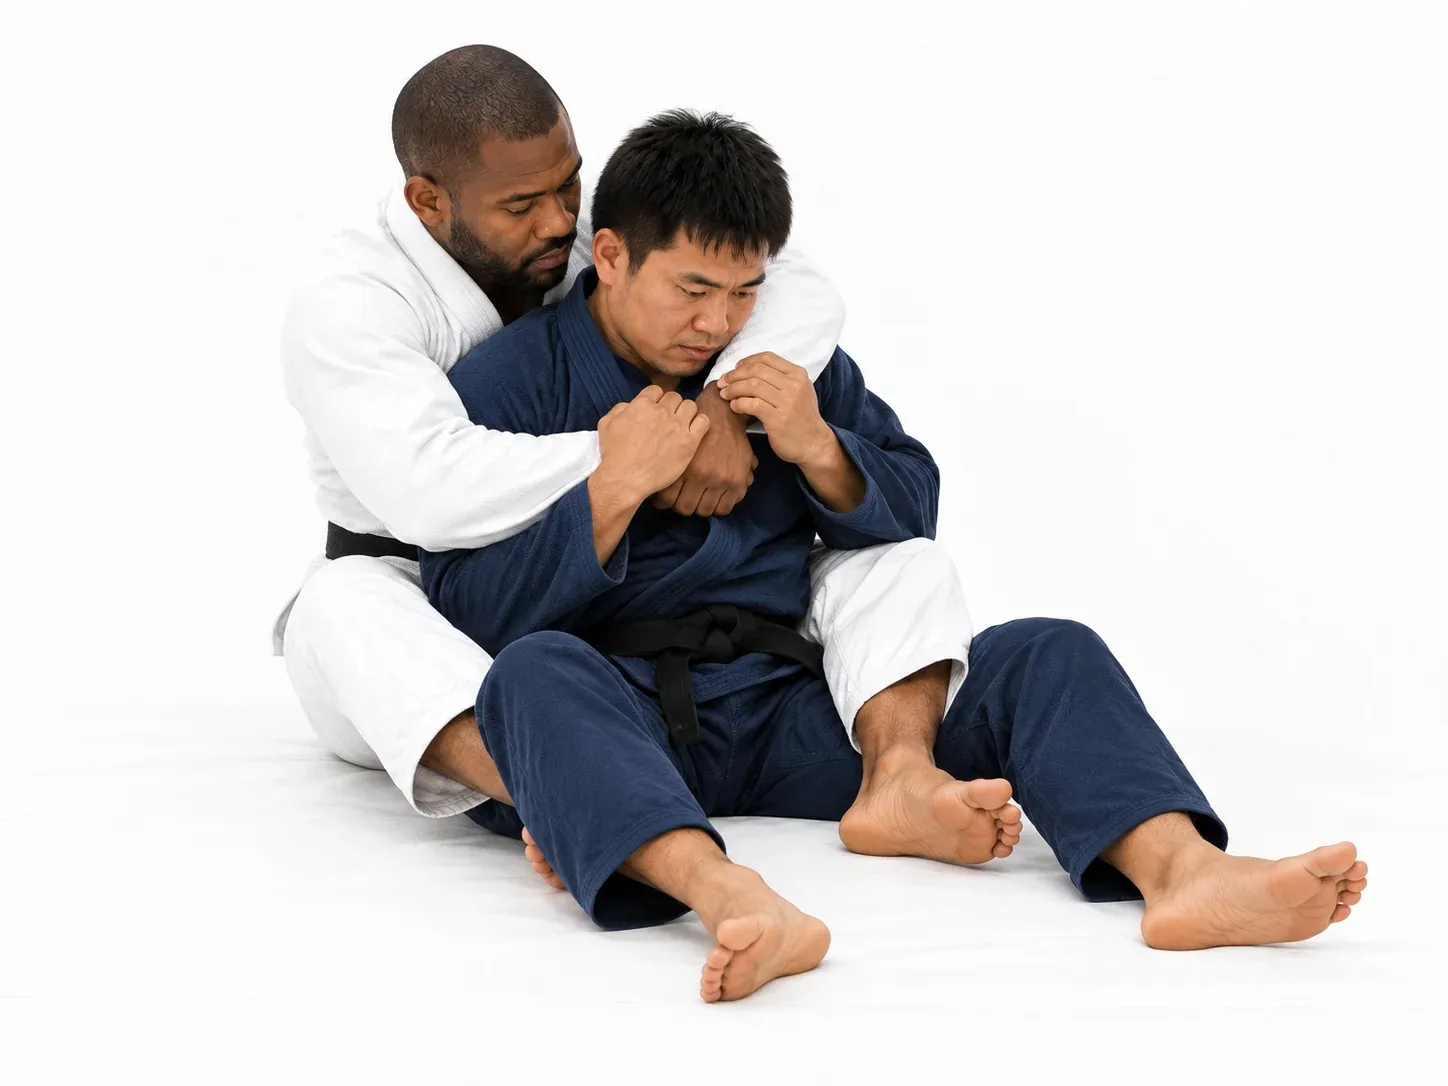
Rushing to take the back before they have committed to turning is how people lose mount for nothing.
Holding a dominant position until the opponent hands you the next one is position before submission in its most literal form.
Why it fails
- You reached instead of moving your hips. Weight comes off, they complete the escape.
- You went for the hooks first. They spin into you and you end up in their guard.
- You followed too late. They got to their knees, and now it is a turtle position rather than back control — related, but a different problem.
- You followed too early. They were not actually turning, and you gave up mount for a three-quarter position.
- You landed underneath. Back control with you flat on your back is much easier to escape.
- You lost the seatbelt in transit. Everything else is negotiable; that grip is not.
What connects to it
This library records the back take from mount as a setup for the rear naked choke, which is the obvious follow-on: the choke is only available from back control and this is one of the routes into it.
Also worth knowing from the other side: the back escape is the answer, and its own first priority is the neck rather than the position. Somebody who has just given you their back by turning is usually not yet defending the choke, which is why the choke percentage from this particular entry is high.
Gi and no-gi
Essentially the same. The transition depends on hips and chest connection rather than grips.
The gi gives you a useful extra on the way in — a collar grip on the far side helps you follow them around and makes the seatbelt easier to establish — and gives them a little more to hold onto while defending. In no-gi the transition is faster and more slippery in both directions.
A collar grip helping on the way in while changing nothing about the position itself is typical of what the gi adds and what it does not.
Drilling it
Drill it as a reaction, not a sequence. Have your partner mount you and have the bottom person turn away on a signal; the top person practises following with the hips and arriving in technical mount with a seatbelt. No hooks, no choke, just the transition.
Then drill the whole thing including the hooks and landing on your side.
And drill the wrong version deliberately once, so you feel it: reach for the shoulder instead of moving your hips, and notice how much space that gives the person underneath. It is a more convincing lesson than being told.
Feeling the wrong version once is worth more than being told about it, and it is a good argument for what drilling is actually for.
Safety
One of the lower-risk techniques here — it is a transition rather than a submission, and nothing in it loads a joint.
The two things to watch: your partner’s neck as they turn underneath you, particularly if your weight is on their head, and the usual caution once you arrive, since back control leads directly to a choke. Everything in the rear naked choke’s safety applies from the moment you get there.
Technique varies with your body and your training partner. Ask your coach or instructor to check whether you are following with your hips or reaching with your hands — it is easy to see from the outside and almost impossible to feel.
Common questions
How do you take the back from mount? You do not usually force it. When the bottom player turns away to escape, you follow their rotation with your hips into technical mount, take the seatbelt, and then insert the hooks.
Why is turning away under mount a mistake? It puts your back to somebody who is already on top of you, with your arms unable to reach them. The escapes that work face the problem rather than turning from it.
Should I grab for the back or move my hips? Move your hips. Reaching lifts your weight off them, which is the space they need to finish the escape.
Seatbelt or hooks first? Seatbelt. Hooks without upper-body control is a position they can spin out of.
How do I make them turn? Attack. A mounted opponent who is not under pressure has no reason to move; a submission threat or heavy pressure forces a decision, and one of their two options gives you the back.
What if they get to their knees instead? Then you are dealing with turtle rather than back control. Related, and the back is still usually available, but it is a different set of controls.