
Escapes
Bridge and Roll Escape
The classic mount escape, usually called the upa — and one of the few techniques that still works at every level once the details are right.
You cannot roll someone over a post. That single sentence explains why most bridge and roll escapes fail, why the successful ones feel almost effortless, and what every detail of the technique is actually for.
The bridge and roll — commonly called the upa — reverses mount by lifting the opponent over one shoulder. It is one of the first escapes almost everyone learns, and unlike a lot of first techniques it does not stop working.
Where it comes from
One place: mount, bottom. That is the whole scope, and it is worth saying plainly because the technique is often taught as a general “bridging escape” and then tried from side control, where it does not apply in the same way.
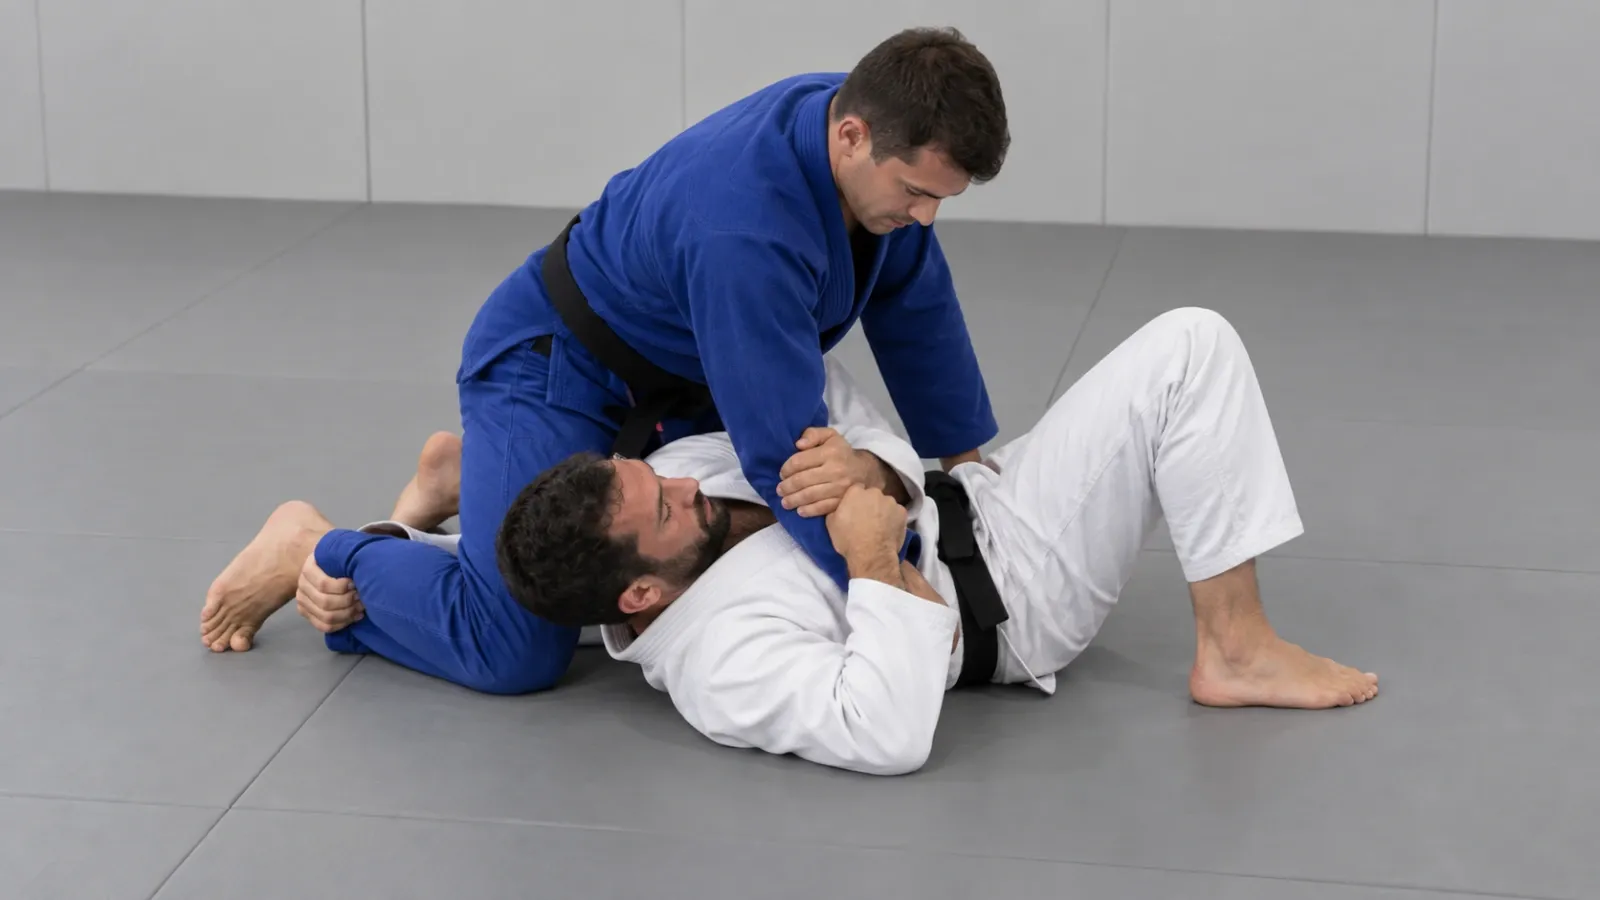
You are flat on your back with someone sitting on your chest. The question the escape answers is: how do you get out from underneath someone who is directly above your centre of mass?
The idea
A person on top of you is a tripod. They have their knees on the mat and their hands on the mat or on you, and as long as they can post a limb in the direction you are pushing, they will simply base out and stay there.
So the bridge and roll is not really a bridge followed by a roll. It is a removal of posts, followed by a bridge that has nowhere for them to go.
Both posts on one side have to be taken away:
- Their arm on that side — trapped above your elbow, pinned across your chest, so it cannot reach the mat.
- Their leg on that side — trapped by hooking your foot over their ankle or stepping your foot outside theirs, so their knee cannot swing out to catch their weight.
Take one and they base on the other. Take neither and you are bench-pressing a person.
The details that decide it
Trap the arm above the elbow. Gripping their wrist is not enough — the elbow can still bend and the forearm can still post. Pull their arm across your body and clamp it against your chest with both of your arms if you need to.
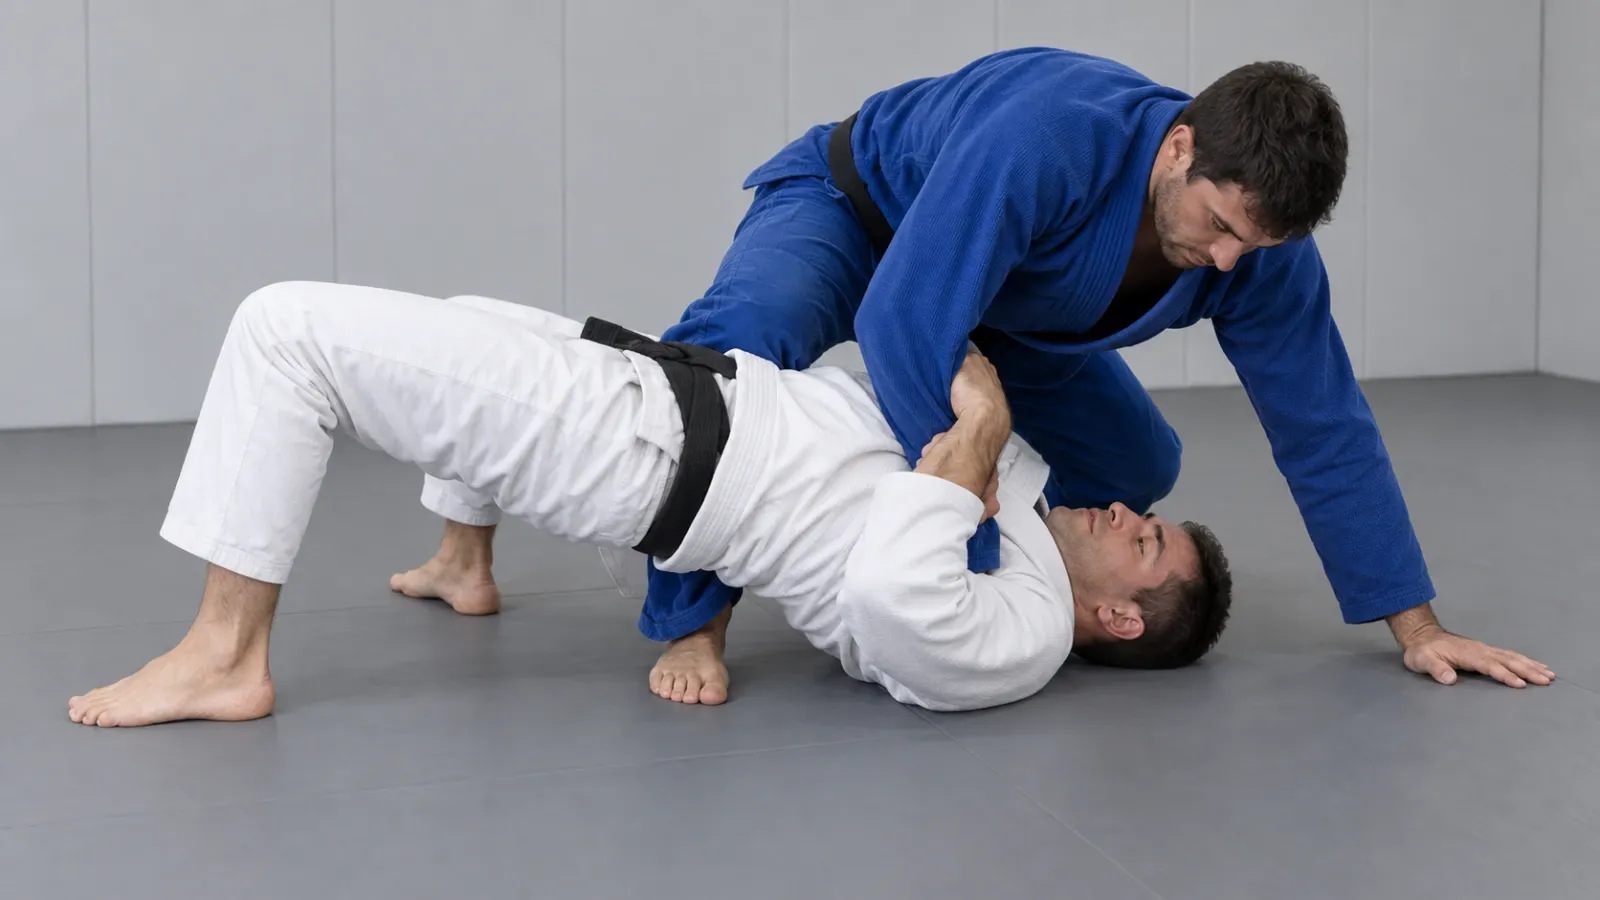
Trap the leg with your foot, not with your hand. Your hands are busy. Hook your instep over their ankle or step your foot to the outside of theirs; either way the point is that their knee cannot swing out to base.
Bridge over your shoulder, not straight up. This is the detail most people get wrong for a long time. Driving straight up lifts them, which is hard and achieves nothing — they just come back down. The bridge goes diagonally, over the trapped shoulder, so their weight travels sideways over a side they cannot post on.
Turn into them as you finish. The roll is completed by turning your hips and following them over, not by throwing them and hoping. You should arrive in their closed guard, on top.
Get your heels close first. Feet flat, heels near your own hips. A bridge from straight legs has no lift in it.
Why it fails
- You bridged straight up. They land back where they started.
- You trapped the wrist, not the arm. They post on the forearm.
- You forgot the leg. They base on the knee.
- You trapped the arm on one side and bridged over the other. Surprisingly common, and it makes the escape impossible — the trapped side and the bridging side must be the same.
- They are too high or too low. A very high mount is harder to bridge; a low mount gives them less base but more room for you to use the elbow-knee escape instead.
- You are doing it flat and slow. The bridge has to be explosive. A slow bridge is just a warning.
Choosing between the two mount escapes
The elbow-knee escape is the other standard answer from mount, and this library records the two as interchangeable — meaning the choice is decided by what the opponent has given you, not by preference.
A rough rule that holds up well:
- They are posting a hand on the mat or reaching for a submission — an arm is available. Take it and upa.
- They are heavy, low and defensive with their arms tight — no arm is available. Frame, make space and shrimp out with the elbow-knee escape.
Good escapes come from switching between the two as they defend. Bridging forces them to post, which creates the space to shrimp; shrimping forces them to follow, which often gives you an arm.
The connection to the bridge itself
The escape is named for the bridge, which is a movement in its own right and the thing worth drilling separately. If your bridge is small, everything built on it is small. Practise it flat on your back with no partner — heels close, hips high, turning over one shoulder rather than lifting straight — and then with a partner simply sitting on you, with no escape attached.
Most people’s upa improves more from a better bridge than from more detail about the escape.
Drilling it
Three stages, and the middle one is the one usually skipped:
- Solo bridges. Height, direction, and turning onto the shoulder.
- Trapping against resistance. Partner in mount, actively trying to post; you just work on taking the arm and the leg. No roll. This is where the escape is actually won.
- The full escape, at increasing resistance, finishing in their guard rather than stopping halfway.
Mount escapes are the first thing most people genuinely need, and they sit near the top of what to work on as a white belt.
Gi and no-gi
Largely the same, because nothing in it depends on grips. The gi gives you a little more friction to trap the arm and a little more for them to hold onto while defending; in no-gi a sweaty arm is harder to clamp, so the timing matters more and people tend to combine it with the elbow-knee escape sooner.
An escape that barely notices the jacket is unusual; most of the game notices it a great deal.
Safety
An escape rather than a submission, so the risks are different. The main one is your own neck: do not bridge onto the crown of your head with your full weight, particularly under a heavier partner. The bridge is onto the shoulder and the upper back, turning as it goes.
As always, technique varies with your body and your partner. Ask your coach to check your bridge direction in particular — it is the detail most often wrong and the hardest to notice yourself.
Bridging under somebody much heavier is a skill of its own, covered from that side in bridging under a heavier partner.
Common questions
What is the upa? Another name for the bridge and roll escape from mount, from the Portuguese. Same technique.
Why can I not roll my opponent over? Almost always because they still have a post on that side — either the arm, or the knee, or you bridged over the side you did not trap.
Should I bridge straight up? No. Bridge diagonally, over the trapped shoulder. Straight up lifts them and they come back down in the same place.
How do I stop them posting their hand? Trap the arm above the elbow and pin it across your chest. Holding the wrist alone leaves them the forearm to post with.
When should I use this instead of the elbow-knee escape? When an arm is available — typically when they post or reach for a submission. When their arms are tight and they are just being heavy, frame and shrimp instead.
Does it still work at higher levels? Yes. It is one of the escapes that survives, because it punishes a specific mistake — posting or overcommitting an arm — that everyone makes eventually.