
Control and transitions

Technical Mount
When somebody under mount turns onto their side, technical mount is where you go. It removes the space the turn created and puts you a step away from their back.
The moment somebody in mount turns onto their side, flat mount stops working — and that is not a problem, it is the plan. Technical mount is the high, rotated version you move to instead: your weight climbs towards their shoulders, one knee comes up behind their back, and the space their turn created disappears. It is the difference between a mount that survives the first escape attempt and one that does not.
Where it comes from
Almost always from mount, in response to the opponent turning onto a hip. That turn is one of the two things a mounted person can do, and it is the more common instinct of the two.
The other response — facing you and framing — is answered by staying heavy and by the usual mount maintenance. Turning away is answered by this. Which is why the position is not optional: a mount with no technical mount in it is a mount that lasts until the first time somebody rolls to their side.
The shape
As they turn, you rotate with them rather than fighting to flatten them.
- Your weight goes up, not down. It stays over their shoulders and upper back rather than sliding towards their hips. This is the detail people get wrong: sliding down towards the hips feels like pressure and actually gives them room to finish the turn.
- The knee on the side they turned towards comes up, behind their back and under their armpit where possible, so there is no gap to shrimp into.
- The other leg stays across, foot hooked or knee heavy, so you do not simply slide off the top.
- Your chest stays on them. The moment you sit up to re-adjust, you have handed back the space.
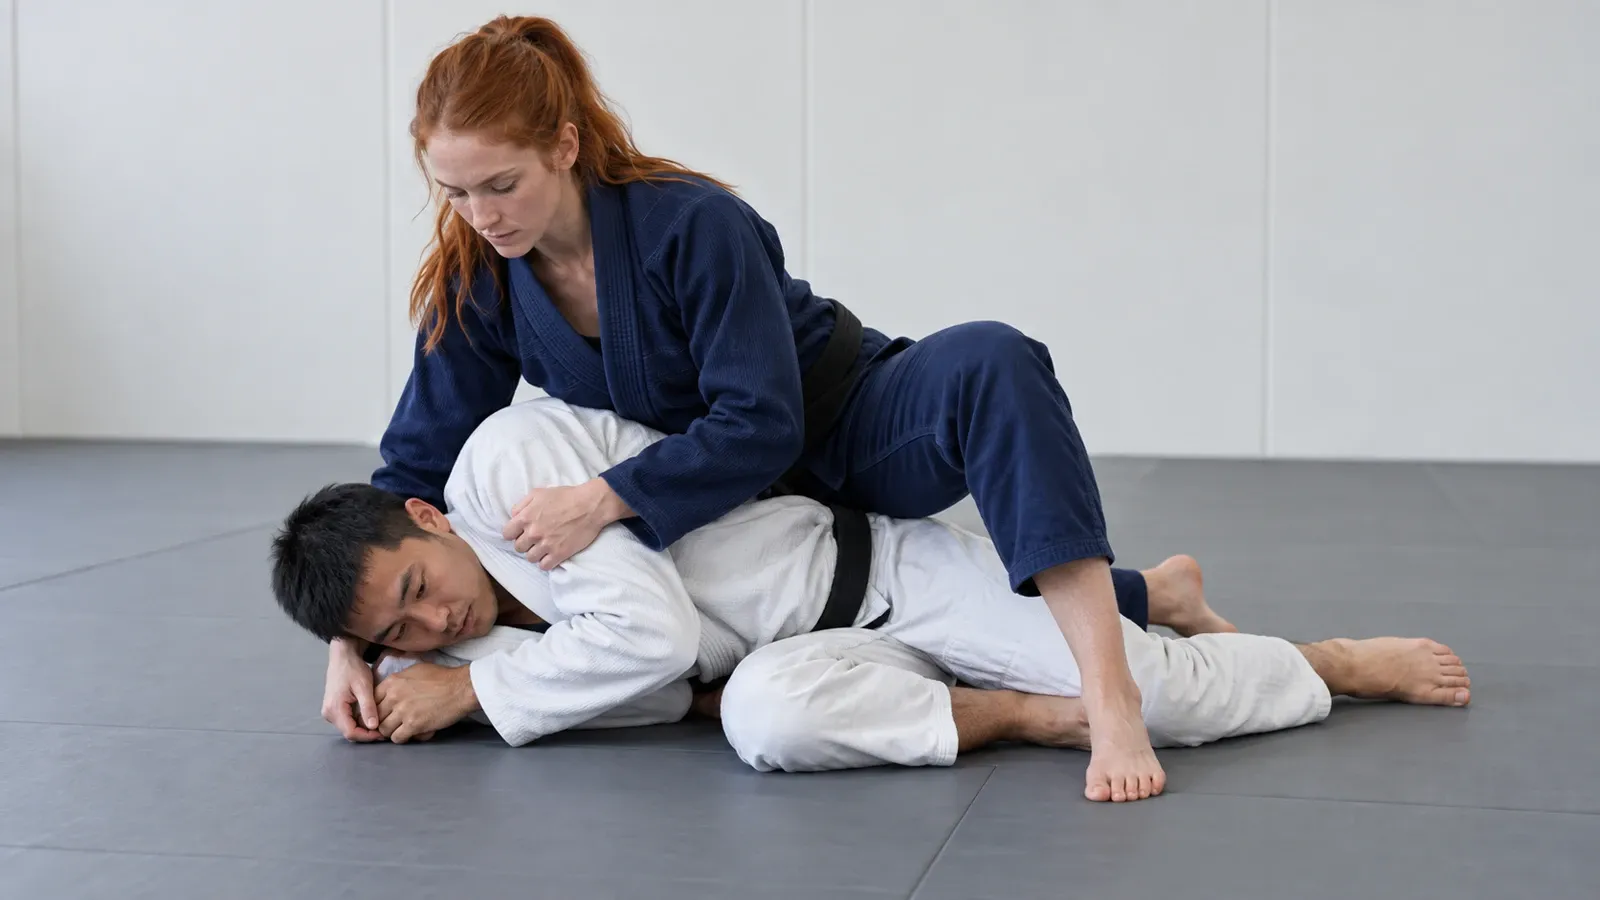
Done properly, the person underneath has turned, achieved nothing, and is now in a worse position than the one they started in.
Why it is usually the last step before the back
Somebody on their side with your knee behind their back has already given you most of the back take. Their shoulders are turned away, their arms are in front of them, and your chest is on the part of their body you want to be attached to.
From here, inserting the first hook and closing the seatbelt is a short move rather than a scramble. That is the same sequence the back take from mount describes from the other direction — technical mount is the position it passes through, and knowing it by name is what stops people rushing the transition and losing the mount instead.
The patience point matters here. A mounted opponent who is not under pressure will simply lie still. Attacking is what makes them turn, and the turn is what gives you this.
What you can attack from it
More than people expect, because the rotation exposes an arm:
- The armbar, often the easiest available finish, because their near arm is usually across their own body and reachable.
- The ezekiel choke in the gi, which is at home in exactly this kind of tight, high position.
- The back, as above, which is normally the best of the three.
- A return to flat mount, if they give up on the turn — and this counts as a win, not a retreat.
Common faults
- Sliding down to their hips as they turn. It feels like you are chasing them. You are in fact handing them the space they were turning to create.
- Sitting upright to reposition. Your chest is the thing keeping them from completing the escape.
- Leaving the bottom knee flat. Without the knee up behind their back there is a shrimping lane, and they will find it.
- Grabbing for the back too early. Reaching lifts your weight. Move your hips first and let the hands follow, which is the same rule that governs every back take.
- Treating it as a different position rather than a phase of mount. It is mount, adjusted. Going back and forth between the two as they turn and untangle is the actual skill.
Drilling it
The rotation itself, both directions, with a partner who only turns. No attacks, no escapes — they turn one way, you take technical mount; they turn back, you return to flat mount. Twenty repetitions each side and the movement stops being a decision.
Then with the partner escaping properly, so you find out how fast the space appears. It appears faster than most people expect.
Then chain it to the back take, as one movement rather than two. Positional rounds starting in mount, where the top player’s only goal is to keep top control, teach this better than drilling the finish — the case for that kind of round rather than a free roll is made in drilling versus rolling.
Safety
One of the lower-risk positions in the sport — nothing is loaded and nothing closes.
The two things worth watching are weight and knees. A knee driven hard into somebody’s spine while you rotate is unnecessary and is a genuine way to hurt a partner, so the knee goes behind their back rather than into it. And if you are much heavier than the person underneath, remember that they cannot breathe well with your chest on their upper back while they are turned; the considerations in training with bigger, stronger partners apply directly.
Always ask your coach or instructor to check your technique and practise safely at your academy.
Common questions
What is technical mount in BJJ? A high, rotated mount used when the opponent turns onto their side. Your weight stays over their shoulders and one knee comes up behind their back, removing the space their turn created.
When should I take technical mount? The moment somebody in mount turns onto a hip. It is a reaction to their movement rather than something you set up in advance.
Why does my mount collapse when they turn? Usually because your weight slides down towards their hips as you follow them. Climbing towards their shoulders instead is what keeps the position.
Is technical mount the same as S-mount? They are closely related and the names are sometimes used loosely. S-mount refers to the leg shape used for attacking the arm; technical mount describes the rotated position itself.
What is worth attacking from technical mount? The back is usually the best option, with the armbar close behind because their near arm is often already exposed by the turn.
Is turning away a bad escape? It gives up the back if you are ready for it, which is why turning towards the person on top and framing is generally taught first.