
Guide
Kimura in BJJ: Grip, Guard Entry and Game Connections
Learn one clear kimura entry from closed guard, distinguish control from finishing pressure and practise a single connected transition.
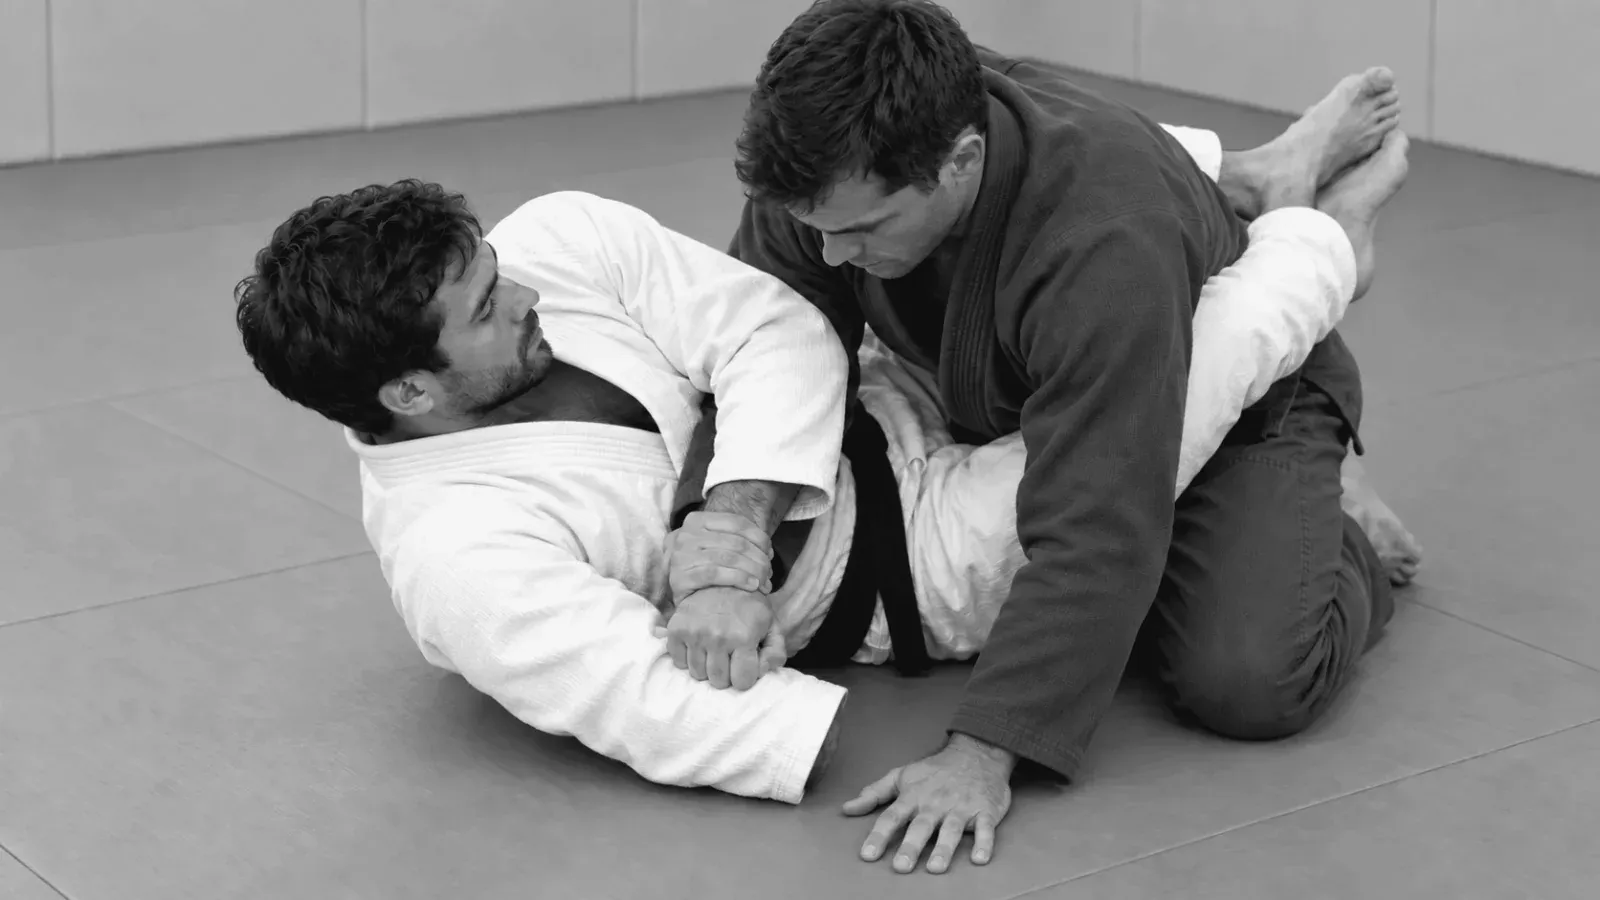
The kimura is a bent-arm submission built around a figure-four grip: one hand controls the opponent’s wrist and the other holds your own wrist after wrapping their upper arm. The grip can also control movement for sweeps and positional transitions. Learn those uses separately from applying finishing pressure to a shoulder.
This guide gives one closed-guard entry, explains the control-versus-finish distinction and shows how to practise a small kimura game. It does not combine mount, north-south and guard finishes into one sequence.
The kimura technique reference maps the wider control system and available positions; this session practises the closed-guard branch.
A closed-guard entry with clear hand assignments
Start on the bottom in closed guard, facing your partner. This example attacks their right arm.
- Bring the opponent towards you so they post a hand on the mat. Your left hand controls their right wrist.
- Open your guard, make space with your hips and sit up. Reach your right arm over their right triceps, then wrap around that arm and grip your own left wrist. This closes the figure four.
- Draw their upper arm close to your chest. Move your hips towards the attacked-arm side while maintaining the wrist control and bent elbow.
- Keep the arm close while your legs control their torso. Place one calf across their back to limit posturing, with the other foot on the mat and the knees drawing together. Keep your angle towards the attacked arm; do not fall flat and lose the connection.
- With the opponent’s elbow bent roughly to a right angle, guide that elbow towards their head while directing the hand towards the back of their head. Move slowly with the body control intact, rather than yanking the wrist. Release at the first tap or verbal signal, before forcing the shoulder past resistance. In an entry drill, stop before adding this finishing pressure.
The original academy kimura lesson illustrates the closed-guard version and its angle. Have your coach check the movement before live finishing attempts. A locked grip is not permission to accelerate.
Control and submission are different objectives
You can obtain the figure four and still lack the position needed to finish. The opponent may keep their arm close, change posture or move their body. Do not interpret every defence as a reason to apply more torque.
In a control drill, your objective can be to maintain the grip while following a small movement, then stop at a stable position. In a finishing drill, the objective is correct alignment with slow pressure and an immediate release. Tell your partner which one you are practising before starting.
The near-side and far-side kimura lesson shows why the same grip appears in different top-side configurations. Near and far refer to which arm is accessible relative to your position. The entry and route to the finish change; a hand assignment from closed guard should not be copied blindly into side control.
Make one connection from the grip
A kimura game becomes useful when you know what to do if the direct finish is unavailable. The grip can support a sweep, a back take or another submission, but none is automatic.
Choose one compatible transition with your coach and save its trigger. For example, a top-side near-arm grip can help turn an opponent onto their side and open a route around them. The illustrated near-side lesson shows a chair-sit back-take branch; practise its position changes separately before joining it to the grip.
Do not improvise a rolling transition while a partner’s shoulder is trapped. Start cooperatively and stop at the new position. Your record should say what actually became available, rather than “defender had no option.”
Three practical drills
Entry to grip. Start in closed guard with a cooperative partner. Create the wrist opening, close the figure four and pause. Check which hand owns which wrist, whether the elbow stays bent and whether your torso is connected. Release without finishing.
Angle without pressure. Begin with the grip already established. Practise the hip movement while the partner gives light posture resistance. Stop when you lose connection or the partner feels shoulder tension. The goal is to identify the angle, not produce a tap.
Grip to a chosen position. Use the single transition your coach selected. One partner offers the agreed reaction; the other follows it and stops at the destination. Once it is recognisable, sometimes withhold that reaction so the attacker must decide whether to transition or reset.
These are suggested practice constraints. Keep intensity low, agree the permitted movements and release on any tap, verbal signal or distress. Do not use pain to test a partner’s flexibility or yank a defended arm behind their back.
Troubleshoot the first lost checkpoint
If the wrist slips, isolate the entry. If you hold the wrist but cannot close the figure four, check distance and the wrapping arm. If the grip is secure but the opponent’s posture defeats the angle, practise the positional control before the finish. If a transition loses the grip, break that transition into smaller cooperative stages.
Record the starting position, attacked arm, defensive reaction, first lost checkpoint and resulting position in your game planner. Connect the entry to its guard family and compare the control problem with the Americana from side control, while keeping their arm orientations distinct.
Your next session should test one of those checkpoints. A repeatable grip-to-position connection is a stronger foundation than several forceful finishing attempts.